ZMIN Barcode Printer Mac OS Driver Installation and Setup Wizard
1. Install the printer driver
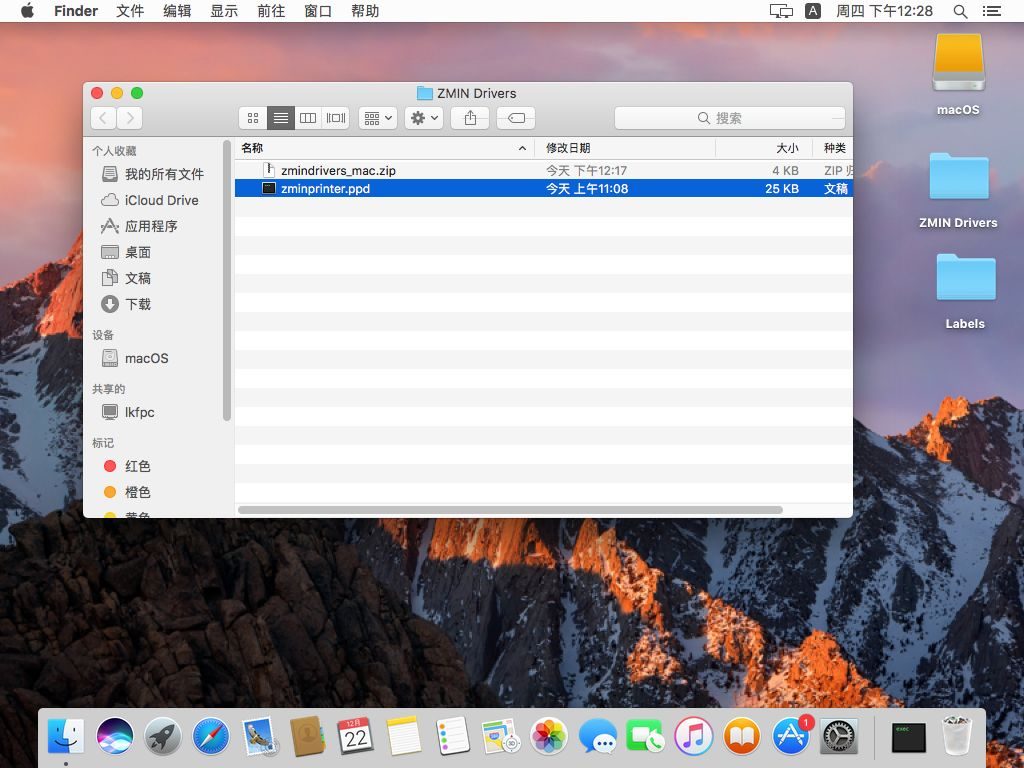
1. Download the driver package from the website (www.zmin.com.cn) and extract it to obtain the PPD file.
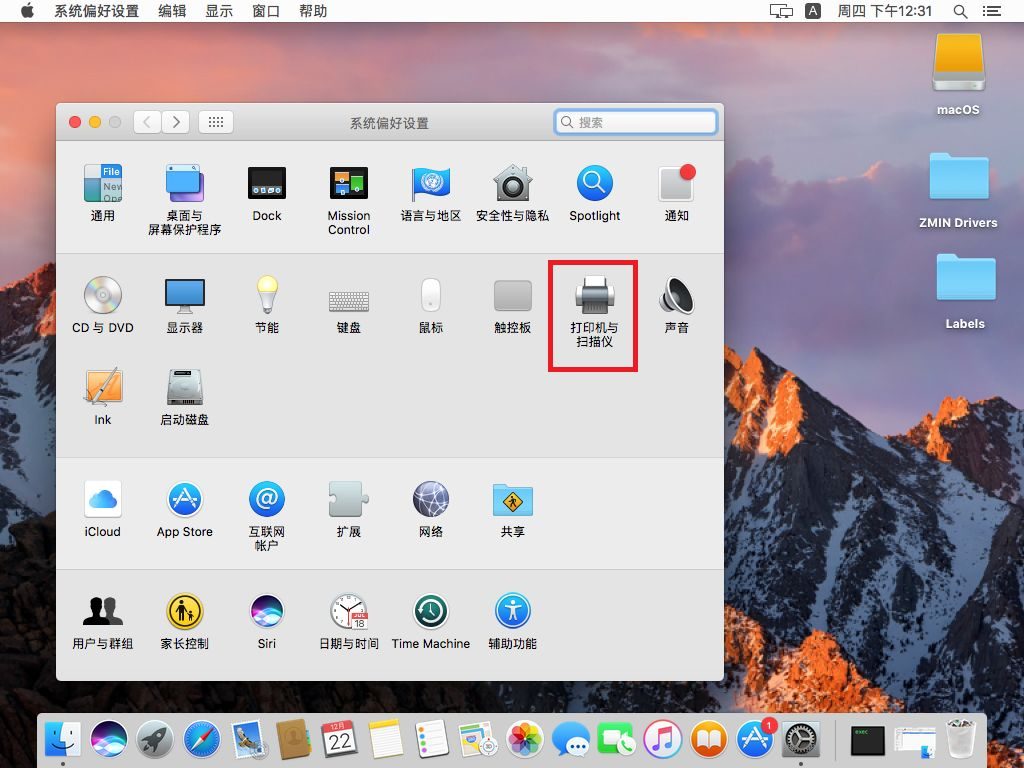
2. Open System Preferences and click "Printers & Scanners".
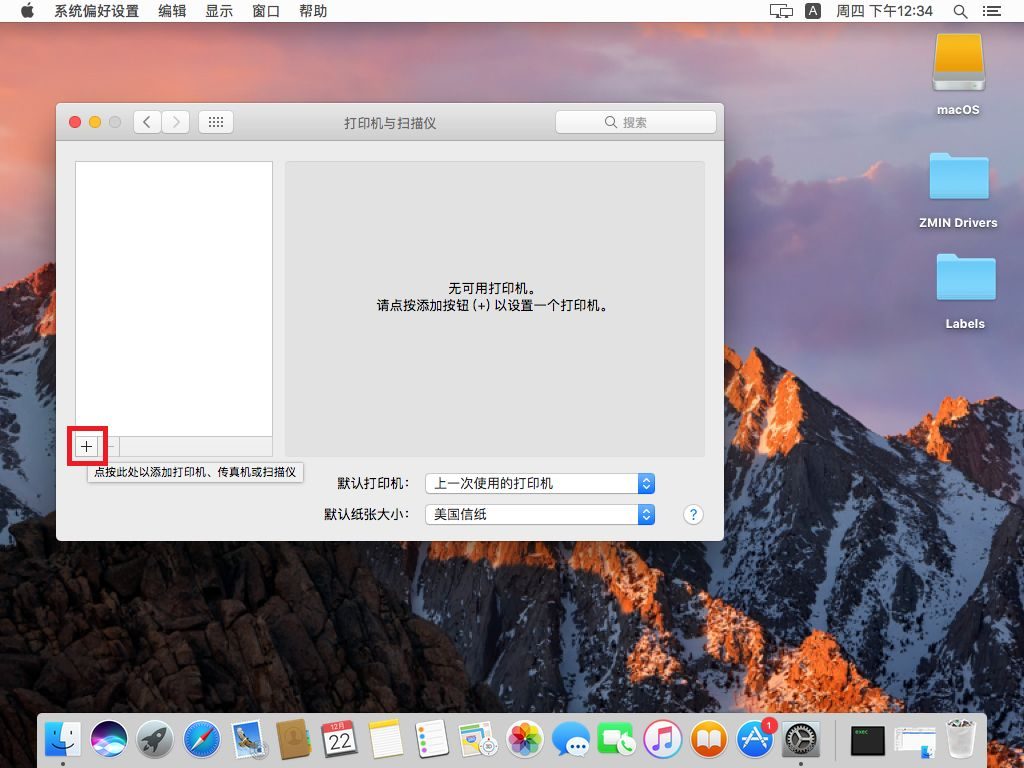
3. Connect the ZMIN barcode printer and turn on the power. After the printer starts up, click the add button (+).
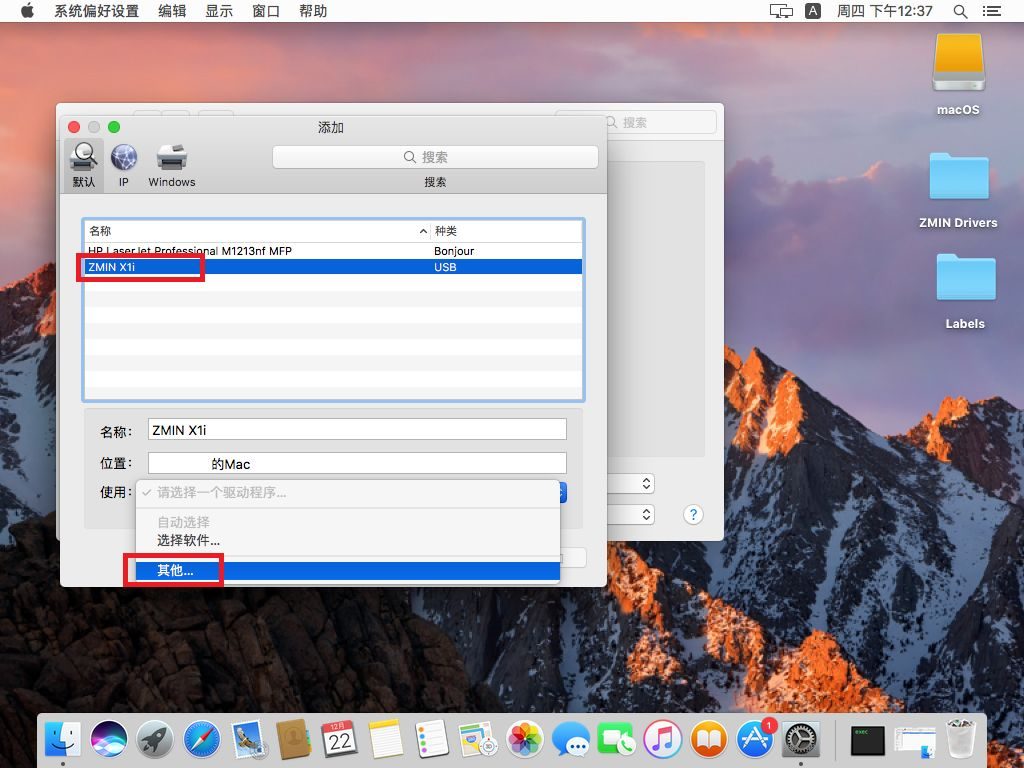
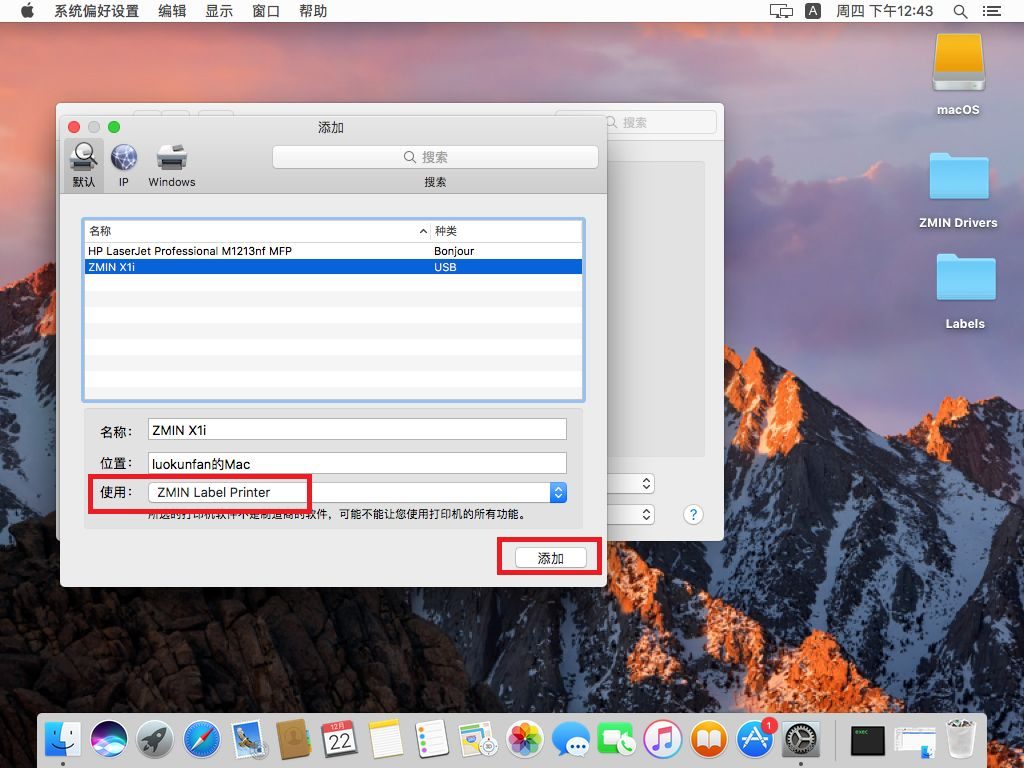
4. Select the ZMIN printer and choose "Other..." from the "Select a driver to use..." drop-down menu.
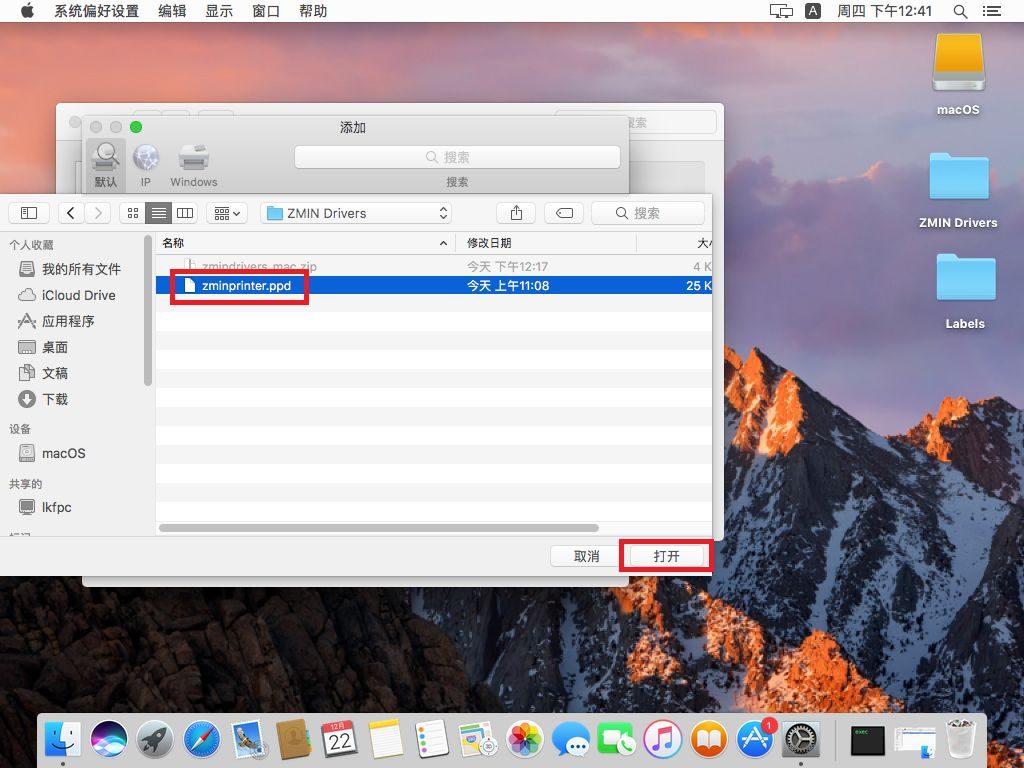
5. Select the downloaded PPD file and click "Open".
6. Click "Add" to install the ZMIN barcode printer driver.
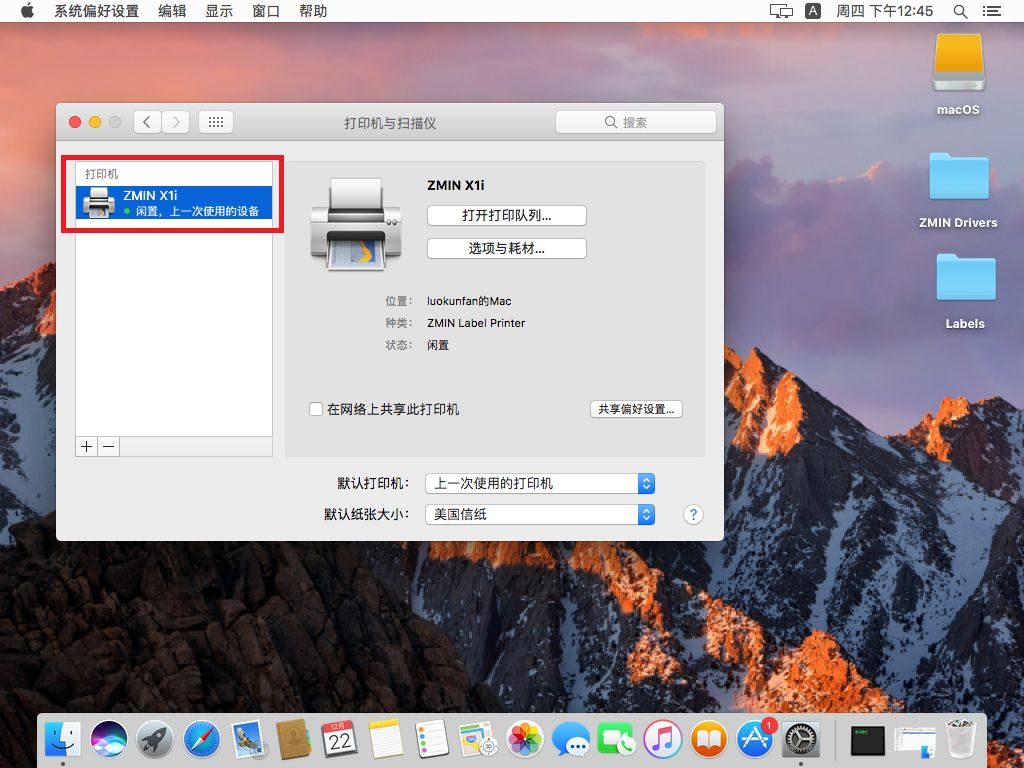
7. Printer installation is complete.
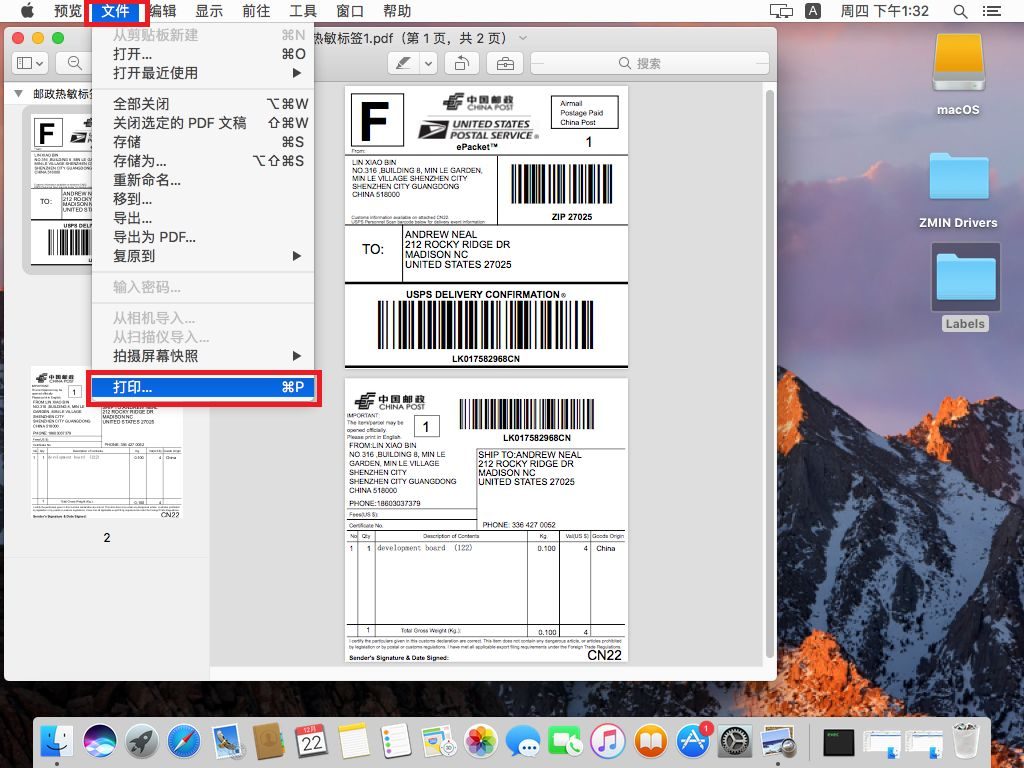
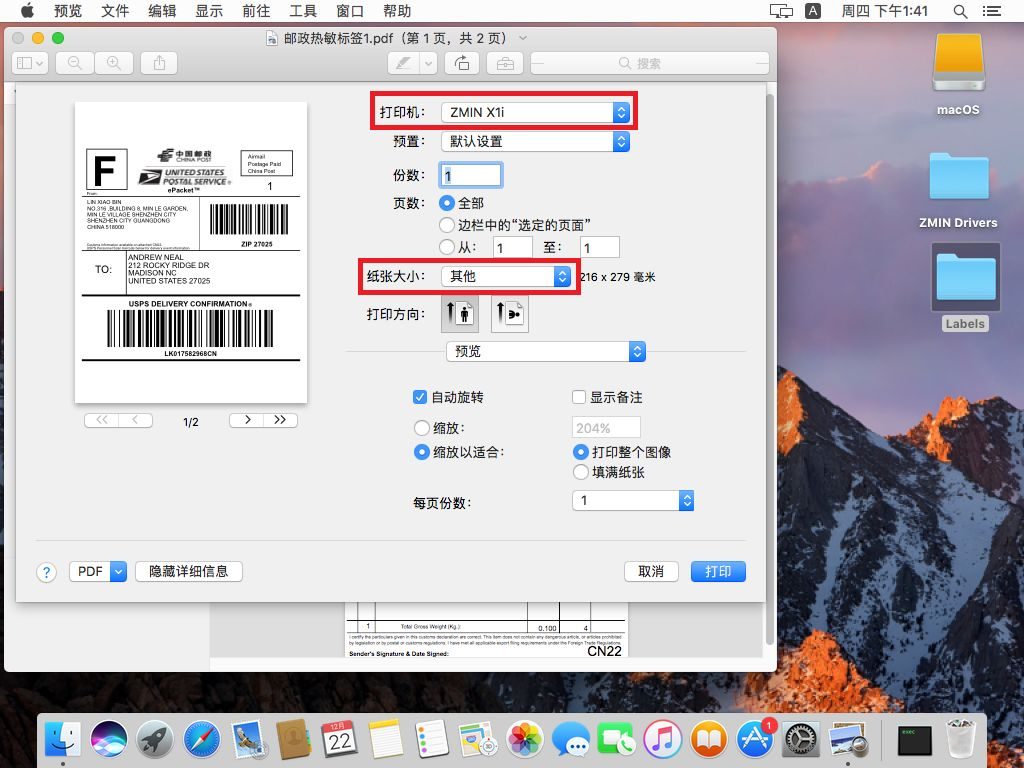
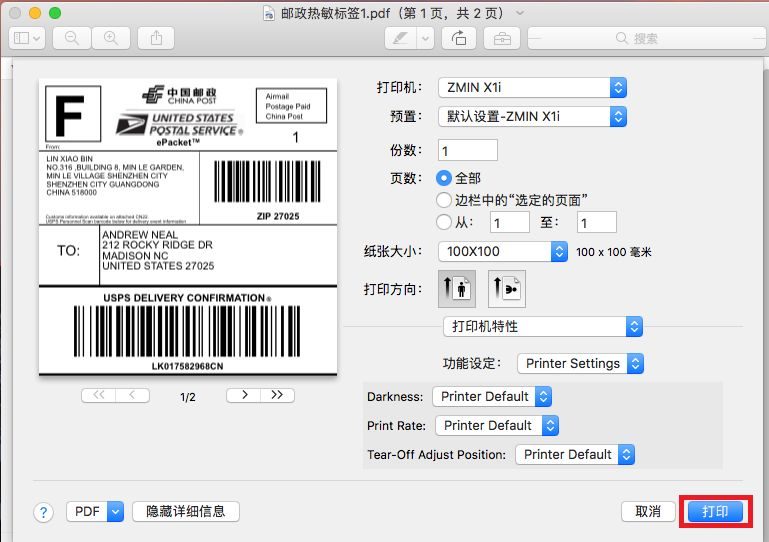
2. Set printer parameters. 1. Open any PDF document and select "File" -> "Print".
2. Select the correct printer and set the paper size.
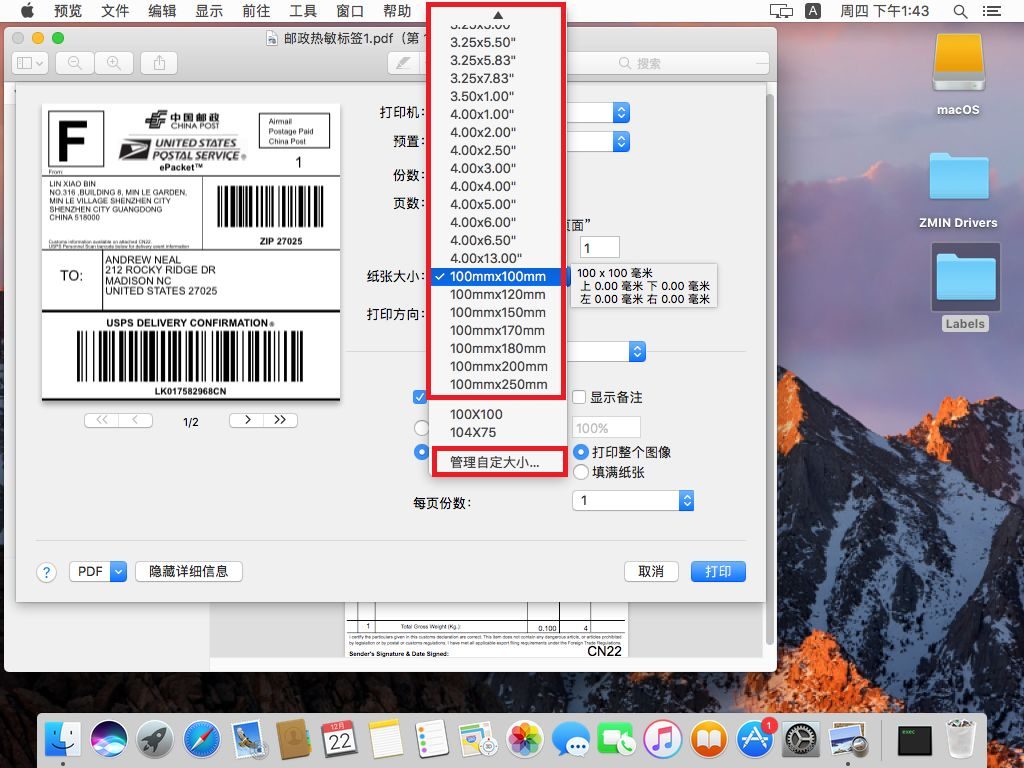
3. Select a preset label size according to the actual label size. If the required size is not in the presets, select "Manage Custom Sizes...".
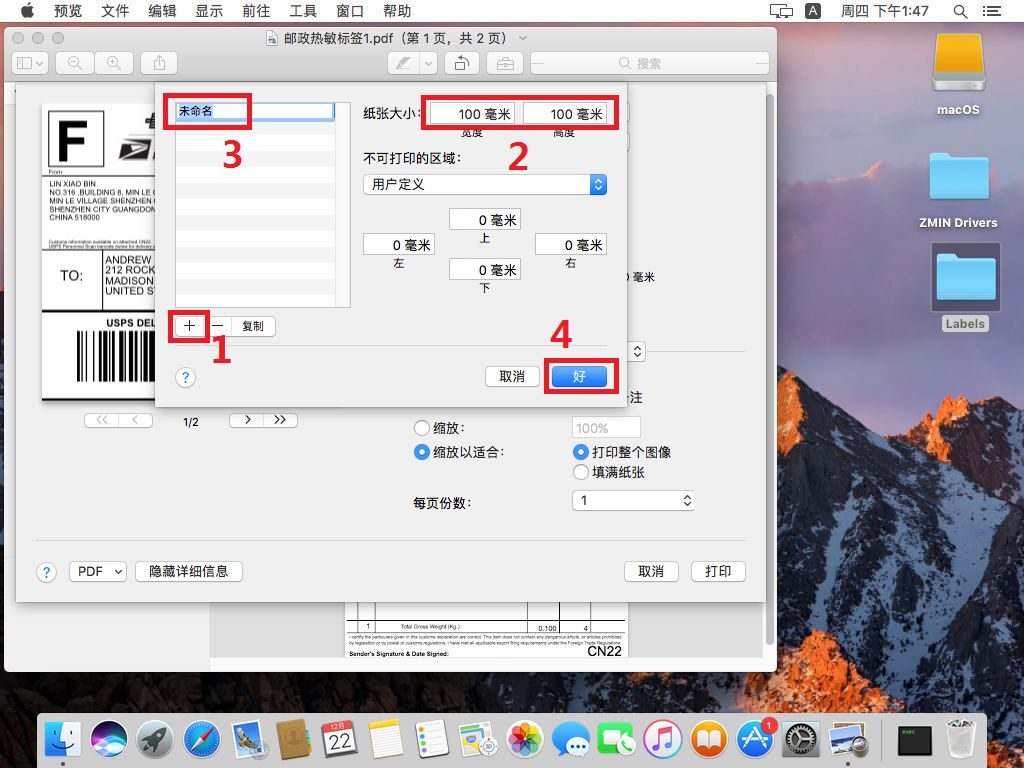
4. Manage custom sizes: click "+" to add a custom label, measure the actual height and width of the label with a ruler and enter them correctly to the right of "Paper Size". Double-click "Untitled" to change the name of the custom label. When done, click "OK" to complete the custom label settings.
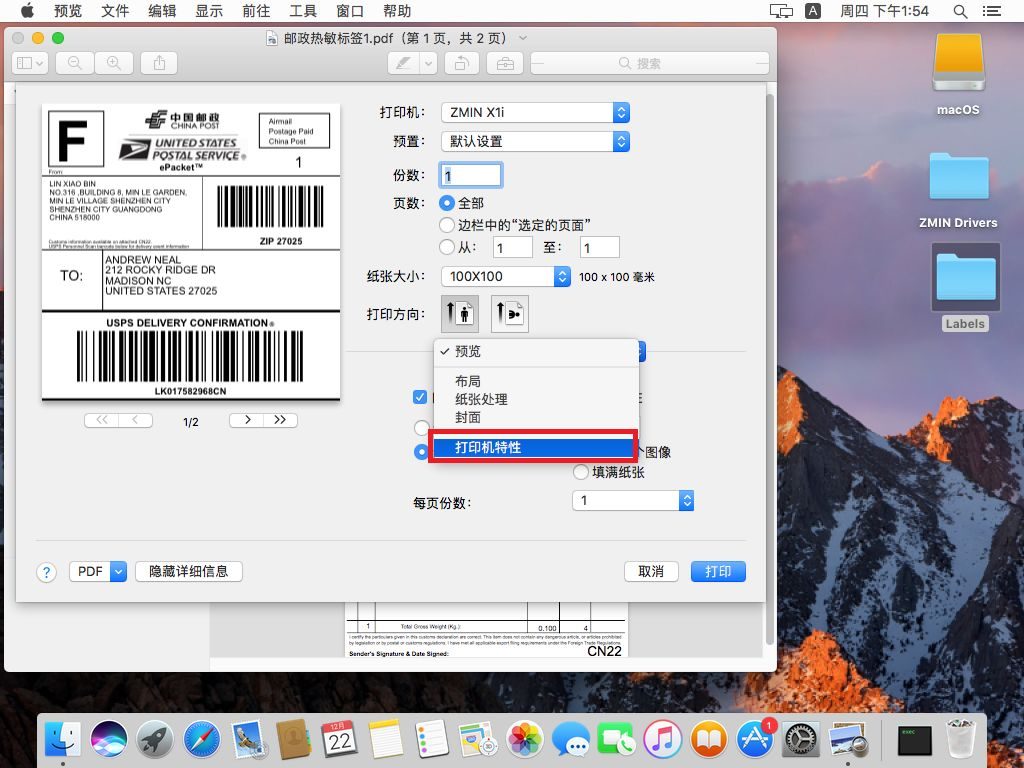
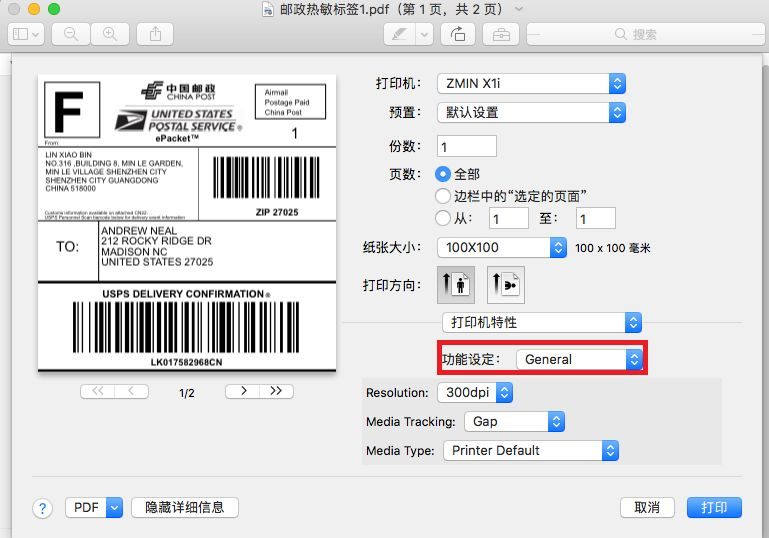
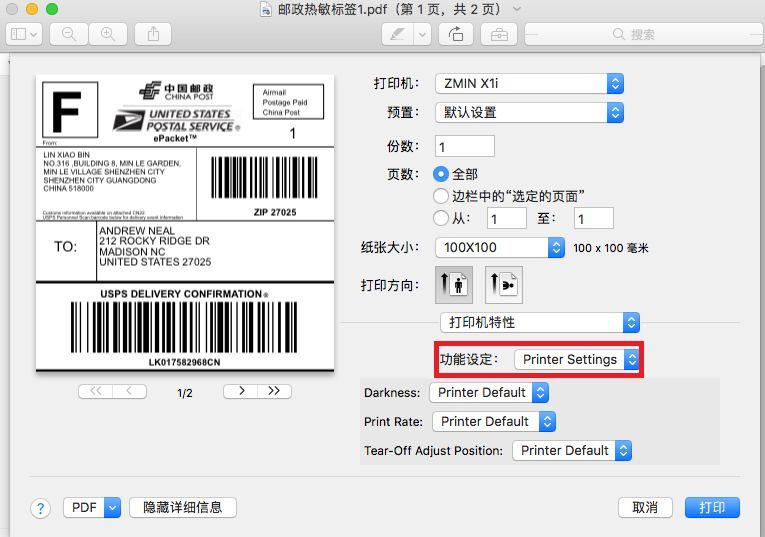
5. Click "Preview" below the print orientation and select "Printer Features".
6. In Printer Features, you can set the printer resolution, print darkness, speed, etc.
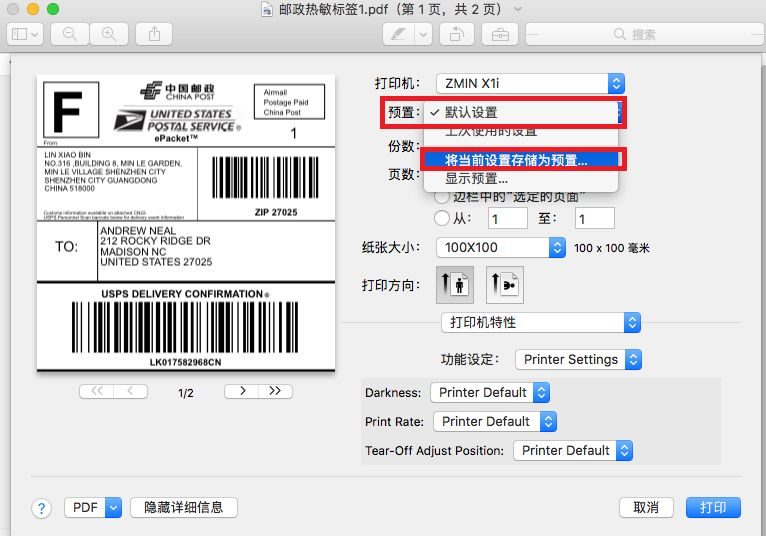
7. After setting all parameters, click "Presets" and select "Save Current Settings as Preset...".
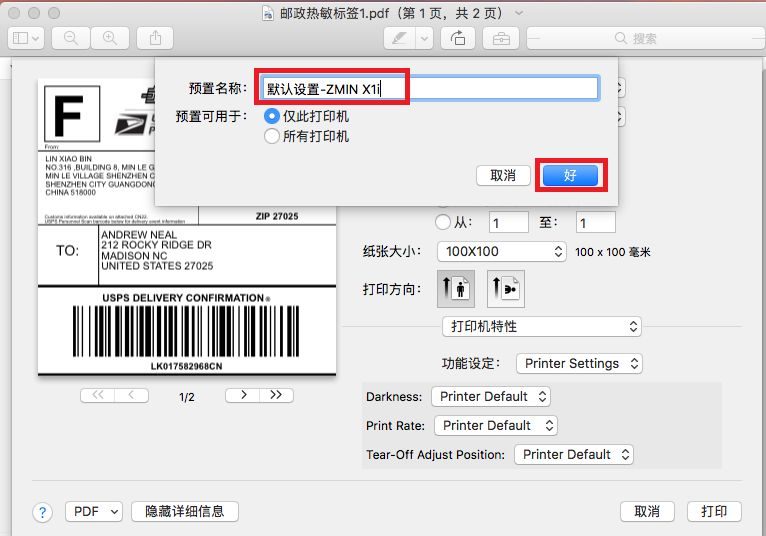
8. Change the preset name and click "OK".
9. All done; click Print.