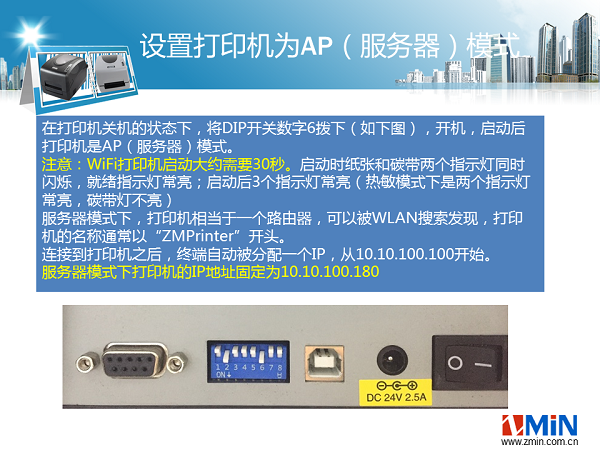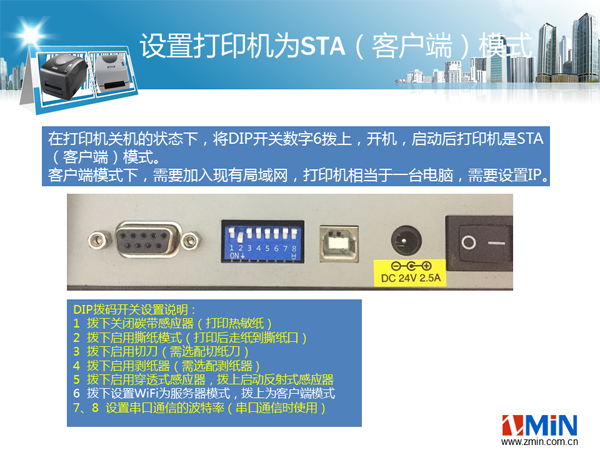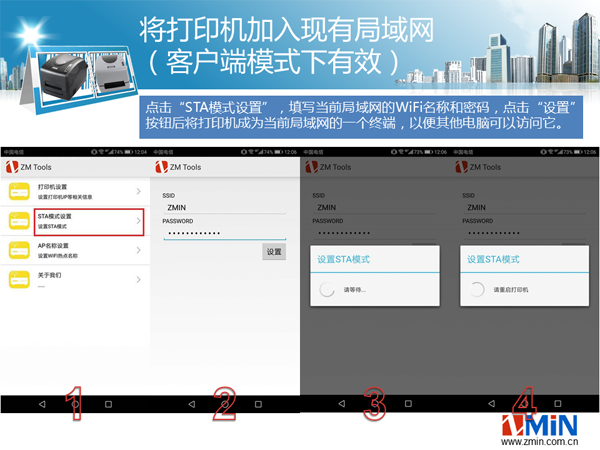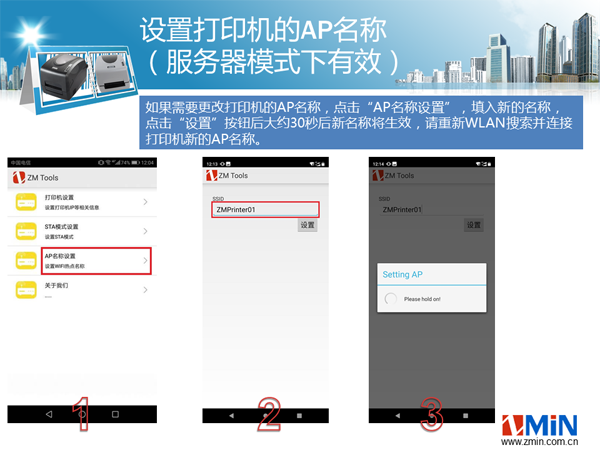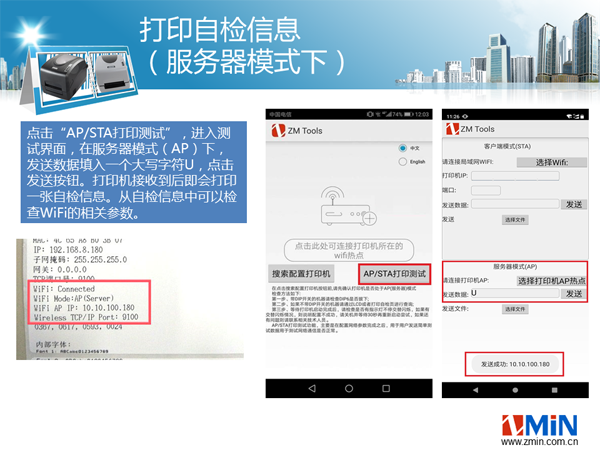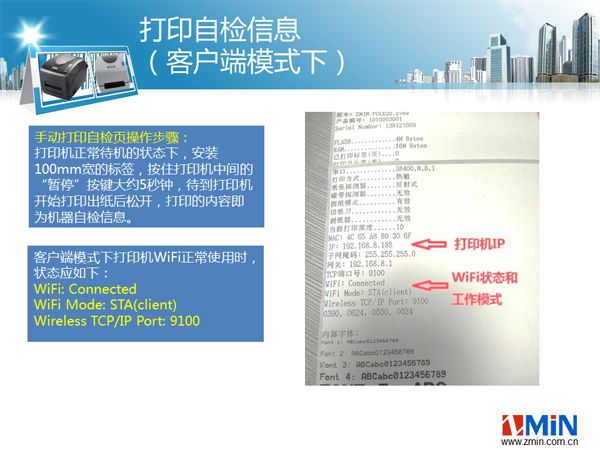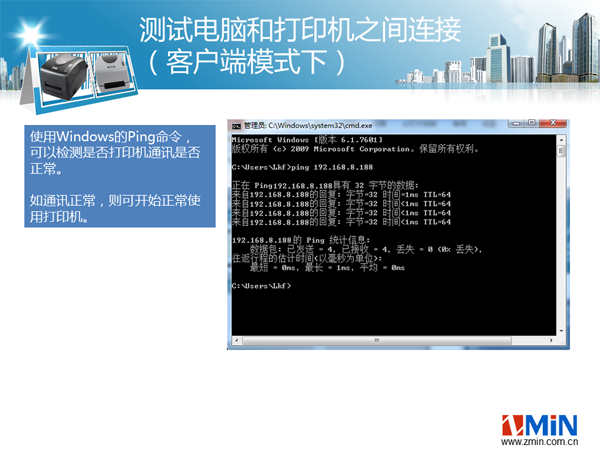
ZMIN barcode printer built-in wireless network card (WiFi) setup and usage instructions I. Setting the printer to AP (server) mode With the printer powered off, slide DIP switch number 6 down (see the figure below) and power on; after startup the printer is in AP (server) mode. Note: A WiFi printer takes about 30 seconds to start up. During startup, the Paper and Ribbon indicators flash simultaneously and the Ready indicator is steady; after startup the 3 indicators are steadily lit (in direct thermal mode two indicators are steadily lit and the Ribbon indicator is off). In server mode, the printer acts like a router and can be discovered by WLAN searches; the printer name usually starts with "ZMPrinter". After connecting to the printer, the terminal is automatically assigned an IP starting from 10.10.100.100. In server mode, the printer's IP address is fixed at 10.10.100.180. II. Setting the printer to STA (client) mode With the printer powered off, slide DIP switch number 6 up and power on; after startup the printer is in STA (client) mode. In client mode, the printer must join an existing LAN and acts like a computer, so an IP address must be set. DIP switch settings: 1 Slide down to turn off the ribbon sensor (print direct thermal paper) 2 Slide down to enable tear-off mode (feed to the tear-off edge after printing) 3 Slide down to enable the cutter (optional cutter required) 4 Slide down to enable the peeler (optional peeler required) 5 Slide down to enable the transmissive sensor; slide up to enable the reflective sensor 6 Slide down to set WiFi to server mode; slide up for client mode 7, 8 Set the serial communication baud rate (used for serial communication)
Download the PDF document: /\upload\WiFi_X.pdf